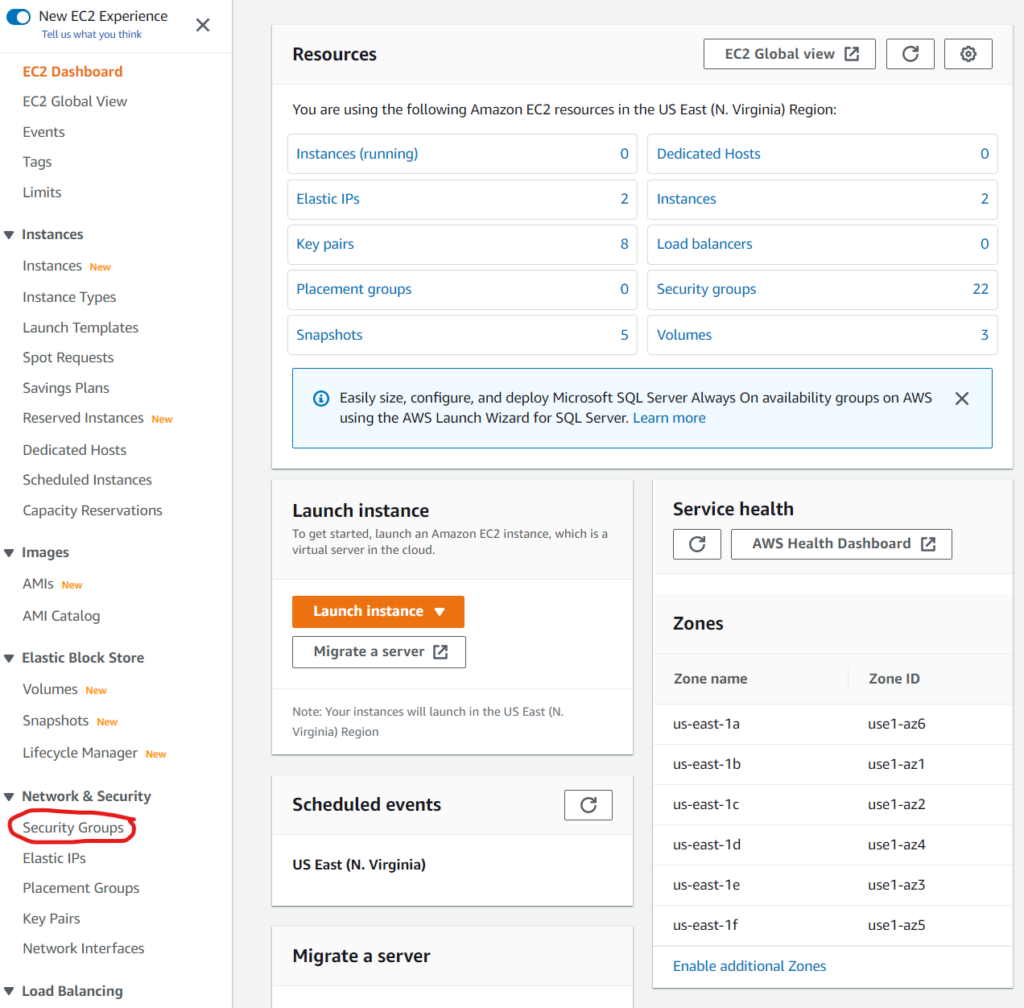
Jenkins is a defacto leading tool for building automated CI/CD pipelines. With Jenkins building, testing and deploying tasks can be done in faster and more robust way. I this post I would like to share step-by-step process of installing Jenkins on AWS infrastructure. Let’s start with setting a few step before we launch an EC2 instance that will host Jenkins master. First of all we need to create a new security group and key pair so we will be able to ssh into our EC2 instance. Under EC2 go to Security Groups and click “Create security group” to create a new group.
Step 1. Create Security Group
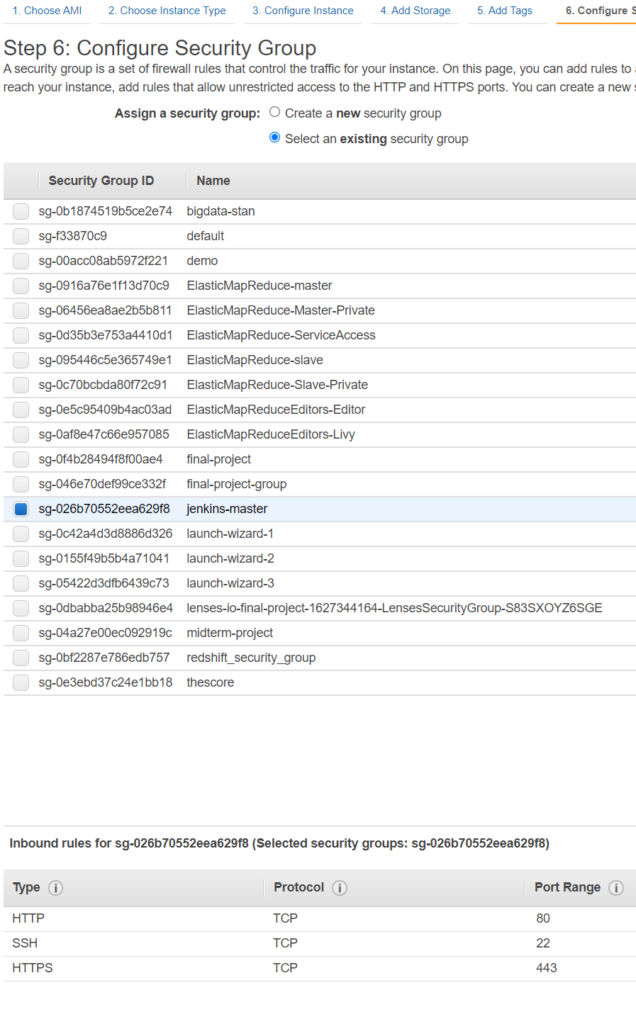
We would need to give it a name and provide 3 inbound rules for ssh, http and https. Optionally we can tag this security group as well. SSH rule should have only My IP source, HTTP and HTTPS should have anywhere source.
Now we can create the new security group named jenkins-master.
Step 2. Create a Key Pair
Key pair is used for authendification and can be used to ssh into any EC2 that was created with the key. Under EC2 go to Key Pairs and click Create key pair.
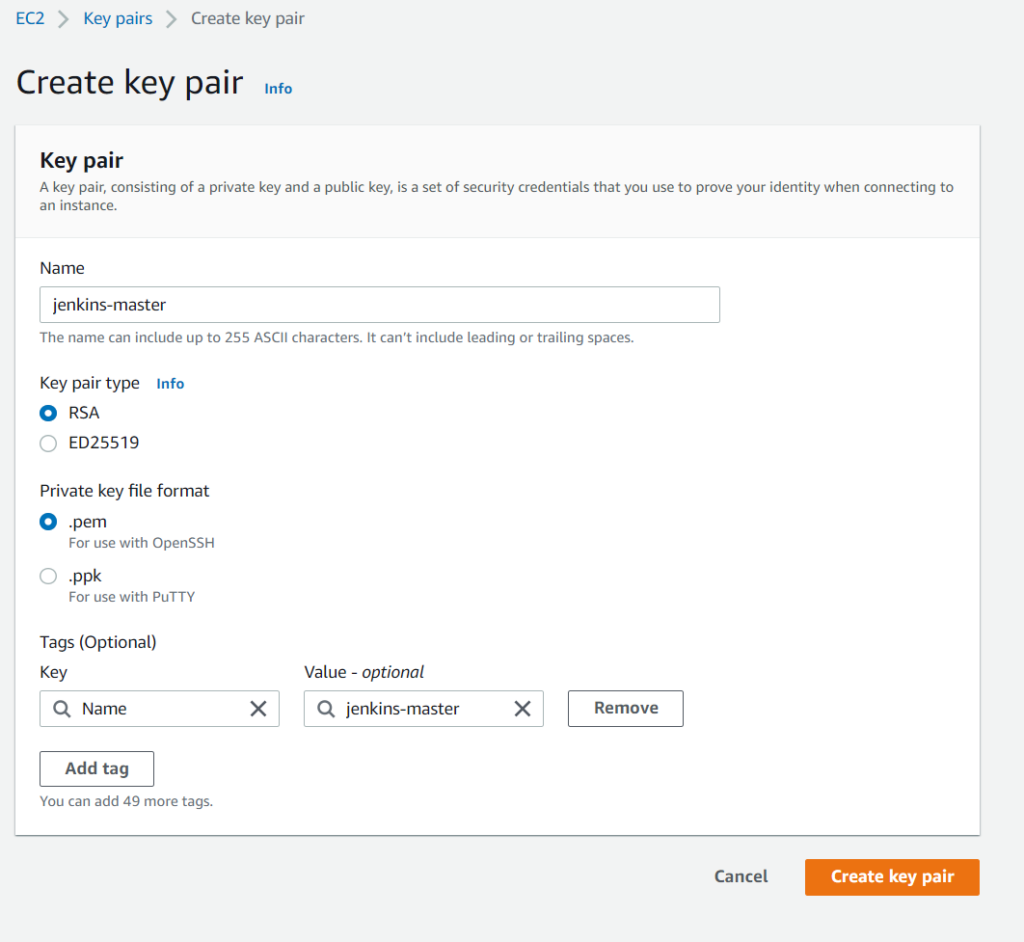
A new key will be downloaded in your Download folder. Now we need to move it to the proper directory by running mv ~/Downloads/jenkins-master.pem ~/.ssh. Now we need to change permission of the pem file that it can be only readable by the user that owns the file, to do so we need to run chmod 600 ~/.ssh/jenkins-master.pem
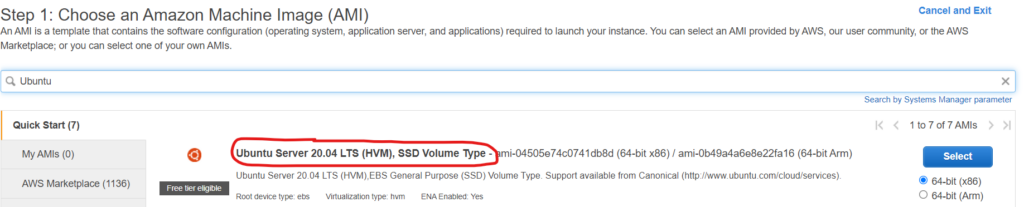
Step 3. Create EC2 instance for Master Jenkins
Under EC2 click Instances and click “Launch instance”, select Ubuntu for AMI
Next we need to select the instance type, for demonstrational propose we are going to use free tier t2micro instance and click Next. In Configure Instance Details page we don’t need to change anything so we click next again. In Add Storage step we can move on since 8GiB will be sufficient for Jenkins master, so we click next. Now we can add Tags Name: jenkins-master. Now we click next to configure security group. We need to select group that we created in the previous step.
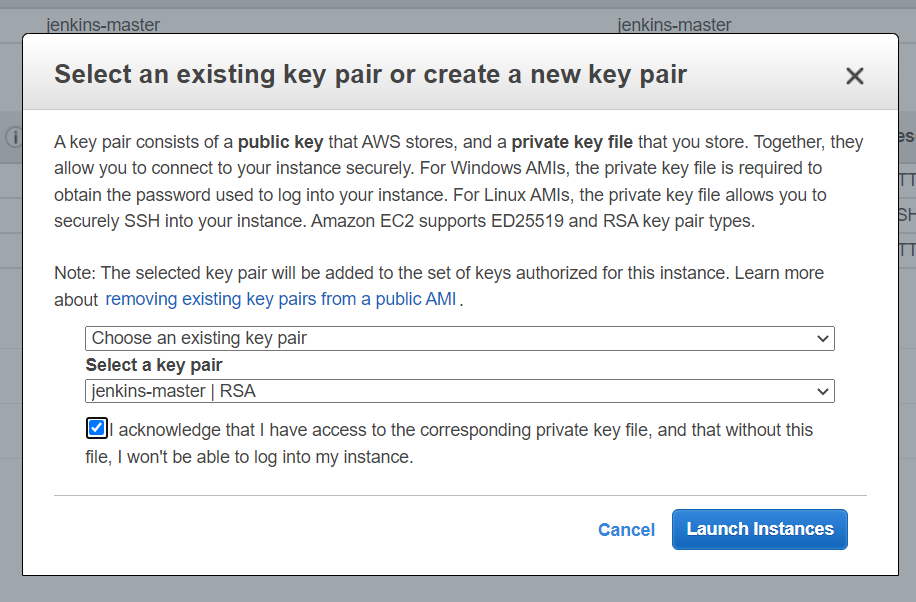
Now we can click review and launch and click launch. Select the key we created previously and acknowledge that you can access to the key and click Launch Instance. After a few seconds the instance will be up and running and we can ssh into it by running ssh -i “jenkins-master.pem” ubuntu@<instance_host_name>. Optionally we can add elastic (static) IP for our instance to prevent a new ip/hostname after instance restart.
Step 4. Install and Configure Jenkins Server
After sshing into the EC2 instance we need to run number of commands to install Java (required to run Jenkins), Jenkins and NGINX reverse proxy. Frist we need to switch to root user by typing sudo su -.
Add the aptitude key for the Jenkins application:
wget -q -O - https://pkg.jenkins.io/debian-stable/jenkins.io.key | sudo apt-key add -
Add the Jenkins debian repo to the aptitude sources list:
echo "deb https://pkg.jenkins.io/debian-stable binary/" > /etc/apt/sources.list.d/jenkins.list
Update the source lists and upgrade any out of date packages:
apt update
apt -y upgrade
Install the software for the Jenkins master: openjdk-11-jdk, nginx, and jenkins.
Install JDK and nginx first:
apt -y install openjdk-11-jdk nginx
Then install jenkins:
apt -y install jenkins
Confirm that jenkins and nginx are installed:
systemctl status nginx  | grep Active
^nginx^jenkins
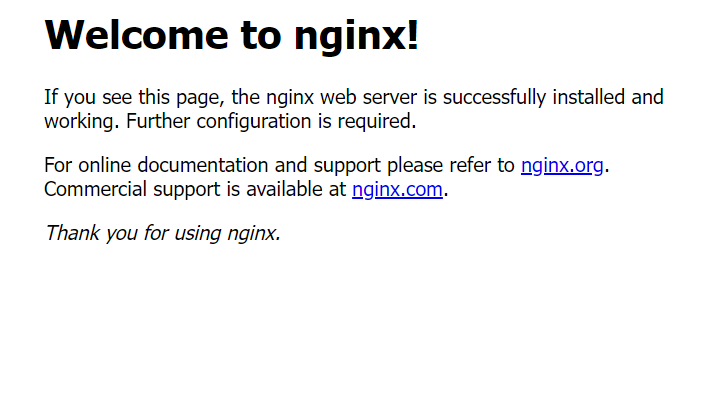
Now we need to configure NGINX that we will be using as a reverse proxy in front our Jenkins web application. NGINX has a few benefits for example it provides more security for the application server, better logging and allows simplified SSL termination. Now if we open EC2 Public IPv4 DNS in a browser we will see NGINX Welcome page.
First thing we need to unlink default nginx configuration, this dosen’t remove configuration it is just disable it.
unlink /etc/nginx/sites-enabled/default
Now we can add a custom configuration, create a new file and copy/paste Jenkins configuration.
vim /etc/nginx/conf.d/jenkins.conf
    upstream jenkins {
        server 127.0.0.1:8080;
    }

    server {
        listen 80 default_server;
        listen [::]:80  default_server;
        location / {
            proxy_pass http://jenkins;
            proxy_set_header Host $host;
            proxy_set_header X-Real-IP $remote_addr;
        }
    }
First block (upstream Jenkins) connects to Jenkins server that is running on localhost and listening on port 8080. Below that is server block that listen on port 80 and proxy all request to upstream server. Now we can test the NGINX configuration:
nginx -t
If there are any errors, edit the configuration file to fix them and then test the configuration again. Once the configuration is testing without errors, reload the configuration:
systemctl reload nginx
Now open a browser to the instance’s address and look for the “Unlock Jenkins” page. Now if we refresh the welcome nginx page we should see Getting Started Jenkins page.
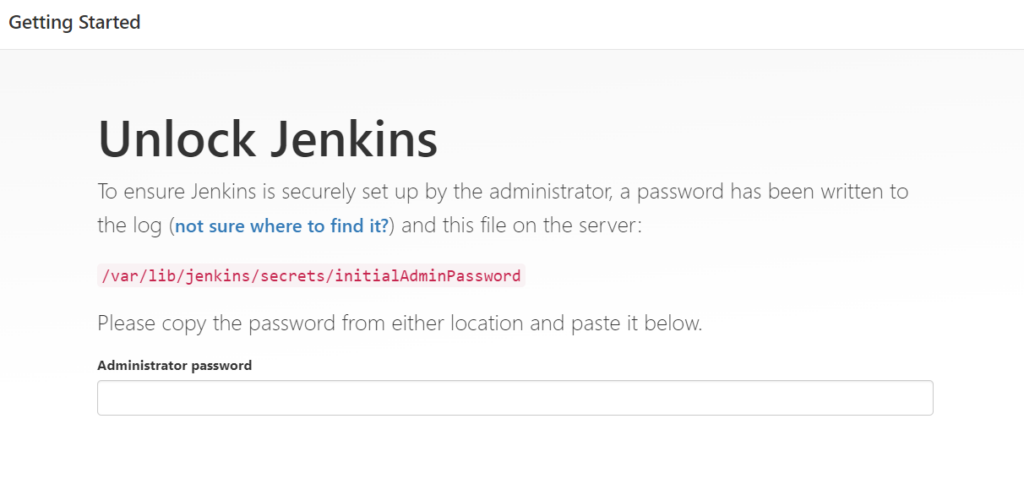
Run this command to get one time password for Jenkins configuration process.
cat /var/lib/jenkins/secrets/initialAdminPassword
Copy and paste the password and click continue. Next, install suggested plugins. One plugins are installed we can create an admin user. After creating the admin user we can click on “Save and Finish”
Step 5. Create a Build Environment
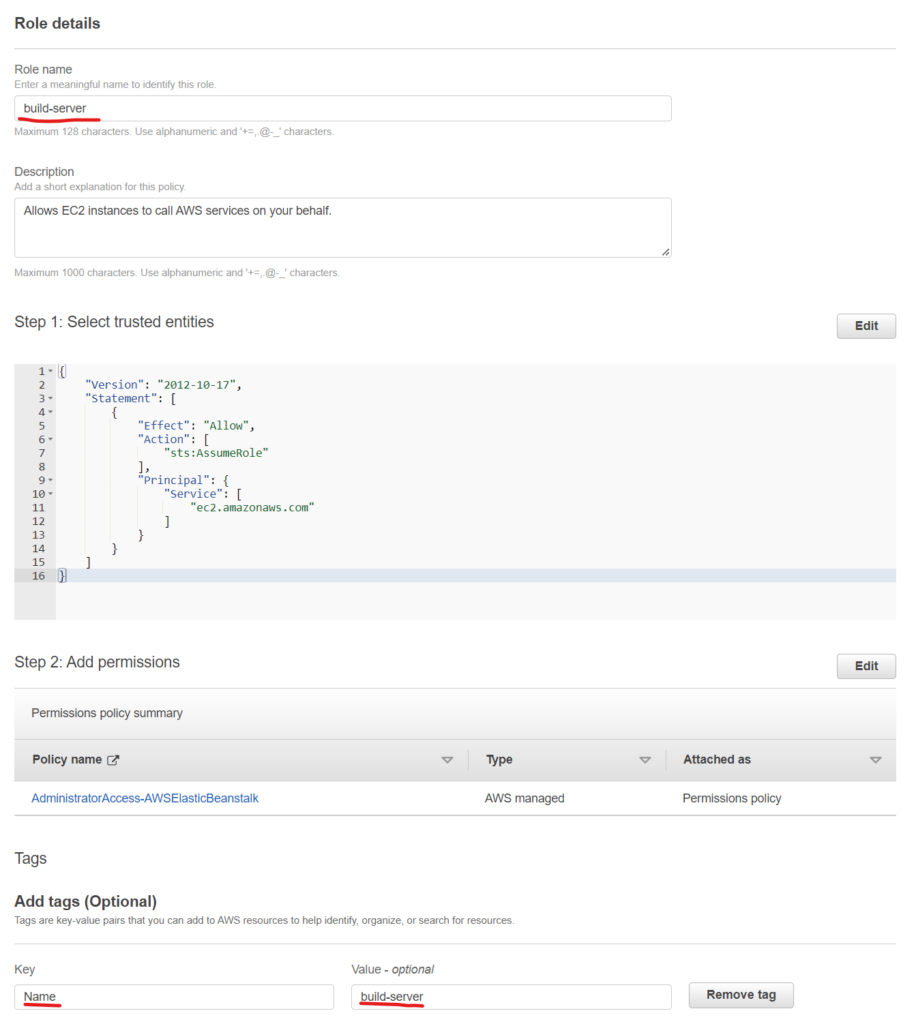
We will follow best practice for distributed Jenkins environment by removing all executors from the Jenkins master. This will prevent all builds starting on the master server, so the master server will managing builds on other servers/workers. To connect our master server to build server we would need key pair and security group and at least one build server. We would need to create an IAM role for the build EC2 server that it can use AWS resources. We need to go to IAM and create a new role.
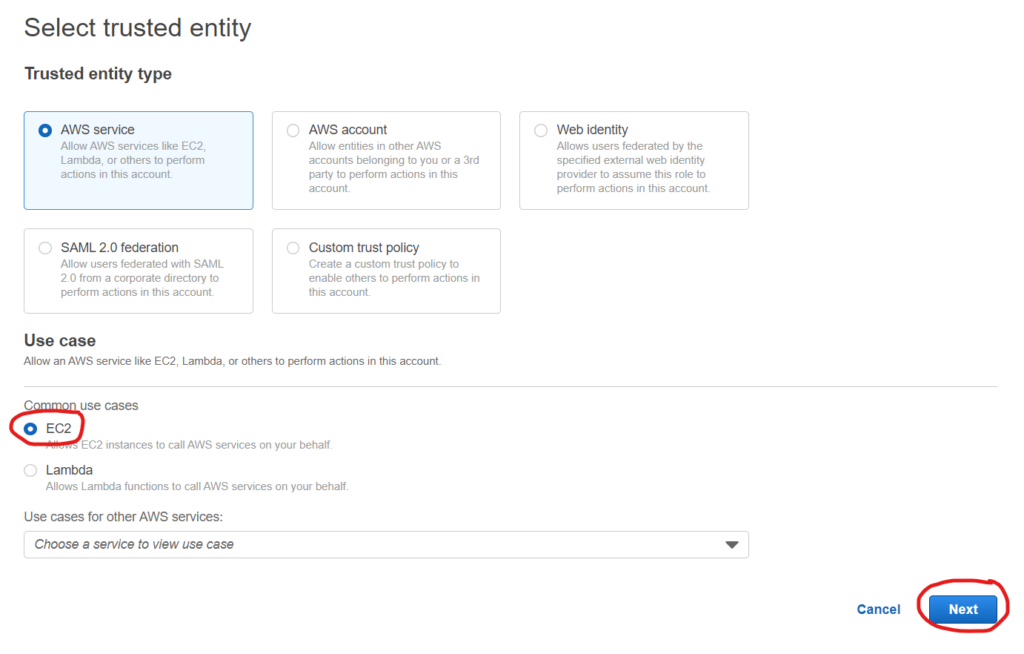
Now we need to select AdministratorAccess-AWSElasticBeanstalk role and click next. Now we need to provide a name for the role, add a tag and click “Create role”.